Passionate About Pages
The Elf on the Shelf has come to visit!
Look who was waiting to greet me in the craft room this morning. I've heard about these little elves who help Santa out but I've never had one visit before. Santa must have realised I need a helper while Kathryn is gallivanting around the world!

Her name is Razzle Dazzle and here's the letter she arrived with. Hope she doesn't spend everyday on my scrapping table or I'll never get anything done.

Looks like we are in for a fun month!
Keep smiling,
Shaunna

Her name is Razzle Dazzle and here's the letter she arrived with. Hope she doesn't spend everyday on my scrapping table or I'll never get anything done.

Looks like we are in for a fun month!
Keep smiling,
Shaunna
Brushed Papers - Using overlays
I have thoroughly enjoyed using the Brushed Workshop on the Go Kit and only had a few odds and ends left over but I had one more layout I wanted to create for my overlays workshop. I'm happy with the way it turned out.
The overlay is cut using the Artbooking Cartridge on the Cricut. I set mine at 5" high which made each vertical band 1 1/4" wide. Simply cut strips of patterned paper to add interest behind the overlay.
Stamping onto patterned paper and adding a few small circles create…
Brushed WOTG Layout
Mike and I travelled to England in July to attend the wedding of 2 special friends. We had such fun! One of the most amusing parts of the reception was the photo booth. The beautiful bride, Shonny, sent us some prints taken in the photo booth which I love. I thought this layout was the perfect home for these photos.

This layout is copied straight from the Brushed Workshop on the Go instruction sheet. It came together quickly. A Cricut overlay was used as a template for sponging - isn't tha…

This layout is copied straight from the Brushed Workshop on the Go instruction sheet. It came together quickly. A Cricut overlay was used as a template for sponging - isn't tha…
Brushed Overlay Page
I love my Cricut machine! I'm not sure how I scrapbooked without it. Today's layout features an overlay cut from the Artbooking cartridge. You'll find it on page 64 of the Artbooking booklet.

I had a lot of fun filling the holes with papers from the Brushed paper Pack. The stamped title uses 3 different stamp fonts and 3 ink colours. Ink entire title in lightest colour then daub the medium and darkest colour around edges.
This layout is displayed in CTMH's Designed Décor Shadow Box in my work…
Last minute cards
I know as super women, balancing work and family, we are also supposed to be organised well in advance for Christmas... BUT I know the reality of life means this doesn't always happen. As a paper crafter you know the value of hand made. Today I'm sharing a little hand made card that can be whipped up in a few minutes.

These two cards were made in a few minutes before breakfast! Here's what you need on hand for card emergencies...

These two cards were made in a few minutes before breakfast! Here's what you need on hand for card emergencies...
- Colonial White Cards & Envelopes (X1410) - 50 in the pack fo…
Artfully Sent Butterfly Card
OK, it's official! The Artfully Sent Cricut Cartridge is my new favourite tool. It makes card making so quick and easy. Here's a card I made using mostly scraps.

The design is already on the cartridge. All I had to do was load my paper into the machine and press 'Cut'. I was doing a few for my team members so I ended up with lots of lovely butterfly die-cuts in different shades of blue which I plan to use on a page later.

Once the base card is cut, use the die cut butterflies to guide your cu…

The design is already on the cartridge. All I had to do was load my paper into the machine and press 'Cut'. I was doing a few for my team members so I ended up with lots of lovely butterfly die-cuts in different shades of blue which I plan to use on a page later.

Once the base card is cut, use the die cut butterflies to guide your cu…
Cool Containers
One of the things I love about being a consultant with Close To My Heart is the active sharing of ideas between consultants. It is rare for me to have to think something up myself - so many really creative ladies make amazing things and show the rest of us how it's done.
Take these fabulous Christmas gift tubes for instance. These ones were made by Katrina Crute, a consultant in my team. She showed them off at this month's team play day. Her inspiration had come from consultants in the Easter…
Take these fabulous Christmas gift tubes for instance. These ones were made by Katrina Crute, a consultant in my team. She showed them off at this month's team play day. Her inspiration had come from consultants in the Easter…
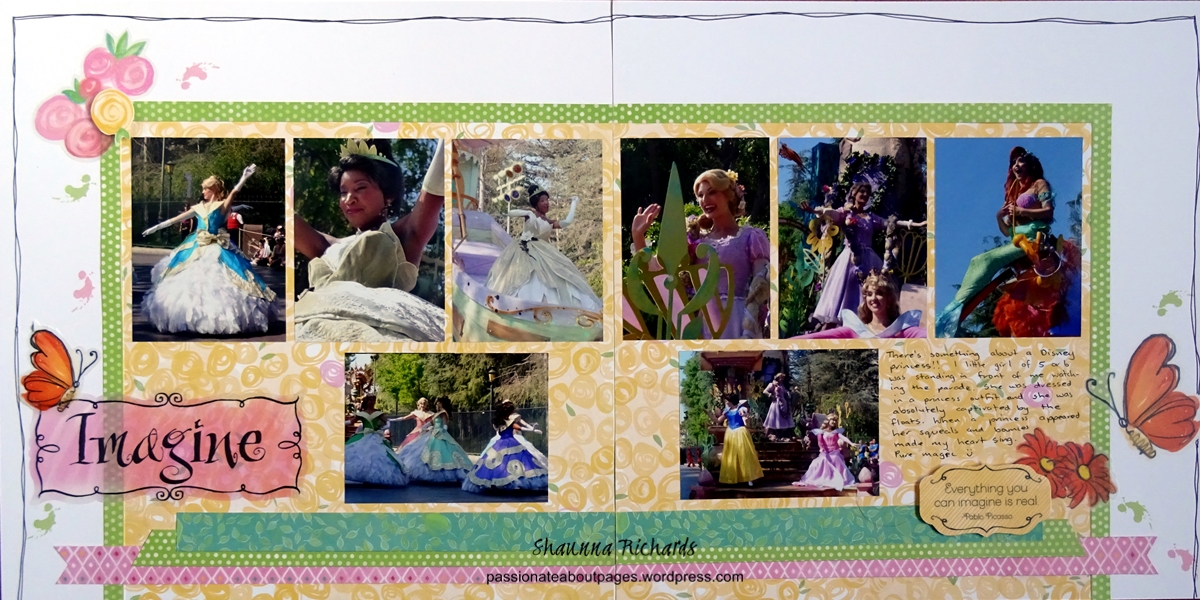
Imagine you were a Princess
When I was at the CTMH Convention in Disneyland, I spent some time in the theme park (as you do) and one of my favourite activities was watching the parade in the afternoon. The first day I watched the characters and was caught up in the magic of it all. The second day I was standing behind a little girl, all dressed up like a Princess, who was having the time of her life. I think I spent more time watching her priceless reactions than I did the show.

This layout is featured in the Brushed WOT…

This layout is featured in the Brushed WOT…
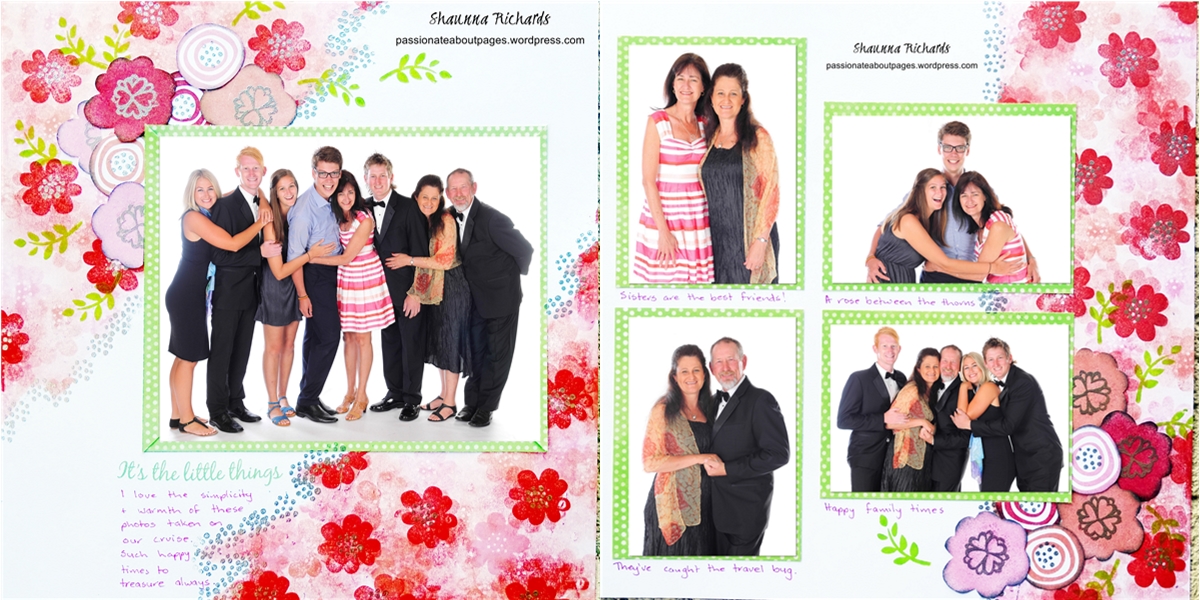
Australasian November 2014 Stamp of the Month Blog Hop S1411 It's the Little Things
Welcome to November's Australasian Stamp of the Month Blog Hop. We have all been creating with the 'It's the Little Things' stamp set. If you arrived here from Wendy's Blog you are in the right spot. If you happened upon us accidently, WELCOME to the hop. Once you’ve checked out my post you can click on the link at the bottom to visit the next blog on the tour. Eventually you’ll end up back here. Enjoy!

I wanted to create a bright and cheerful layout to match the mood of these photos taken …

I wanted to create a bright and cheerful layout to match the mood of these photos taken …
A Cut Above
I was at a friend's house on the weekend and her teenage daughter bounced into the room to proclaim, "It's only 8 more Fridays until Christmas!"
What's your reaction to that news? Something along the lines of, "So much to do, so little time..."?
If that's how you are feeling then the Close To My Heart Cut Above Kits are made just for you! Each kit comes with all the supplies you need to make 10 cards or 10 treat bags. The BEST bit is that everything is pre-cut! Imagine putting together 10 gorge…
Categories
- Cards (64)
- Stamping (109)
- Thin Cuts (49)
- Photo Organisation (1)
- Album Planning (1)
- Scrapbook Layouts (244)
- Stamp of the Month (91)
- Paper Craft (11)
- Paper Fundamentals (17)
- Simple pages (2)
- Washi Tape (8)
- Flip Flaps (11)
- Tools (16)
- PML (4)
- Organisers (3)
- stickers (6)
- Albums (7)
- Workshops (3)
- watercolour pencils (2)
- Watercolour paints (2)
- Workshops Your Way (34)
- Special Offers (39)
- Organise Your Photos (3)
- Craft with Heart (3)
- Storytelling (6)
- VIP (3)
- Shimmer Brush (1)
- Glitter Paper (1)
- Paper Candy (2)
- Interactive Cards (1)
- Metallic Markers (1)
- Tell Your Story (2)
- Distress Oxides (2)
- Nearly Bare Pages (1)
- Wedding (2)
- Stencils (1)
- Free download (2)
- Organisation (1)
- Same but Different (1)


